Posts

Showing posts with the label modelling

Project/update - Trousers, 17/03/20

Image
Continuing to model my character, now moving onto the lower half. This consists of two components, possibly three depending on how the model will be completed. This will consist of the trousers, gaiters and boots. The gaiters are protective covers that stop mud getting into the boot, made of various materials including canvas and wool.  Three-Quarters view Three-Quarters lower Trousers behind

Personal Project - Rose scene, 18/03/20

Image
This is a slightly different post consisting of me and my partner. The image has been created using Maya and photoshop. It took a couple of trials and errors but I am quite happy with the final composition. This included the use of rendering with Arnold to create the correct lighting and sub-surface scattering in the roses. The rose, which has been previously shown, has been used with grass to populate the scene. A matte painting technique has also been used to create the sky. A bit more time was need to try and make the photo, maya scene and sky blend together in a cohesive fashion.  Final composition Photo taken at the 'Trickeye Museum Seoul' in Korea Element created in Maya photo and roses combined Today's five minute pose with the mery rig, this time with help from a SMLE prop from a previous project. Five minute pose with mery rig

Project/update - Blocking torso, 17/03/20

Image
I have not have much time to add towards the torso. Nevertheless I feel like the majority of the tunic has been completed. All that is need is the arm and sleeve details. Soon after that I can add the collar and hands. More five minute pose exercises using the Mery rig. The first exercise proved a little dis-orienting as the camera was rotated 180 degrees. There are a few points of contact that I am missing in the five minutes given such as the head touching the ground render of exercise the 'right' way up

Project/update - Blocking torso, 13/03/20

Image
Continuing to model the torso, I have added sleeves and the lower section below the belt. As for now the upper torso is the most completed with several creases in the fabric. Never the less it is far from finished. The profile of the model had to be changed in-order to make sense in a 3D world. This has also included change the overall shape of the torso, no longer following the orthograph with complete accuracy. Details to be added to the torso include the shoulder material, belt details and some more creases. half of the tunic behind half of the tunic whole tunic whole tunic behind Five minute pose exercises, one using the bony rig the other two using the Mery rig.

Project/update - Hair, 23/02/20

Image
In an attempt to keep the character relatively simple the geometry was less dense for the head. The hair modelled contains more polygon in order to get the desired shapes and edges. Because of the denser mesh it was a little confusing to clean but I am happy with the result.    three-quarters view I have gone for a smoother and abstract style of hair which will rely on the texture to give more detail. I have to apologise for having the screen shot appearing so fuzzy as I had not turned the anti-aliasing up on the view port. left side view back three-quarters right side view lower view The 5 minute pose exercise was completed using reference from a pose generator.  reference from: https://www.quickposes.com/en/gestures/random

Project/update - Head, 22/02/20

Image
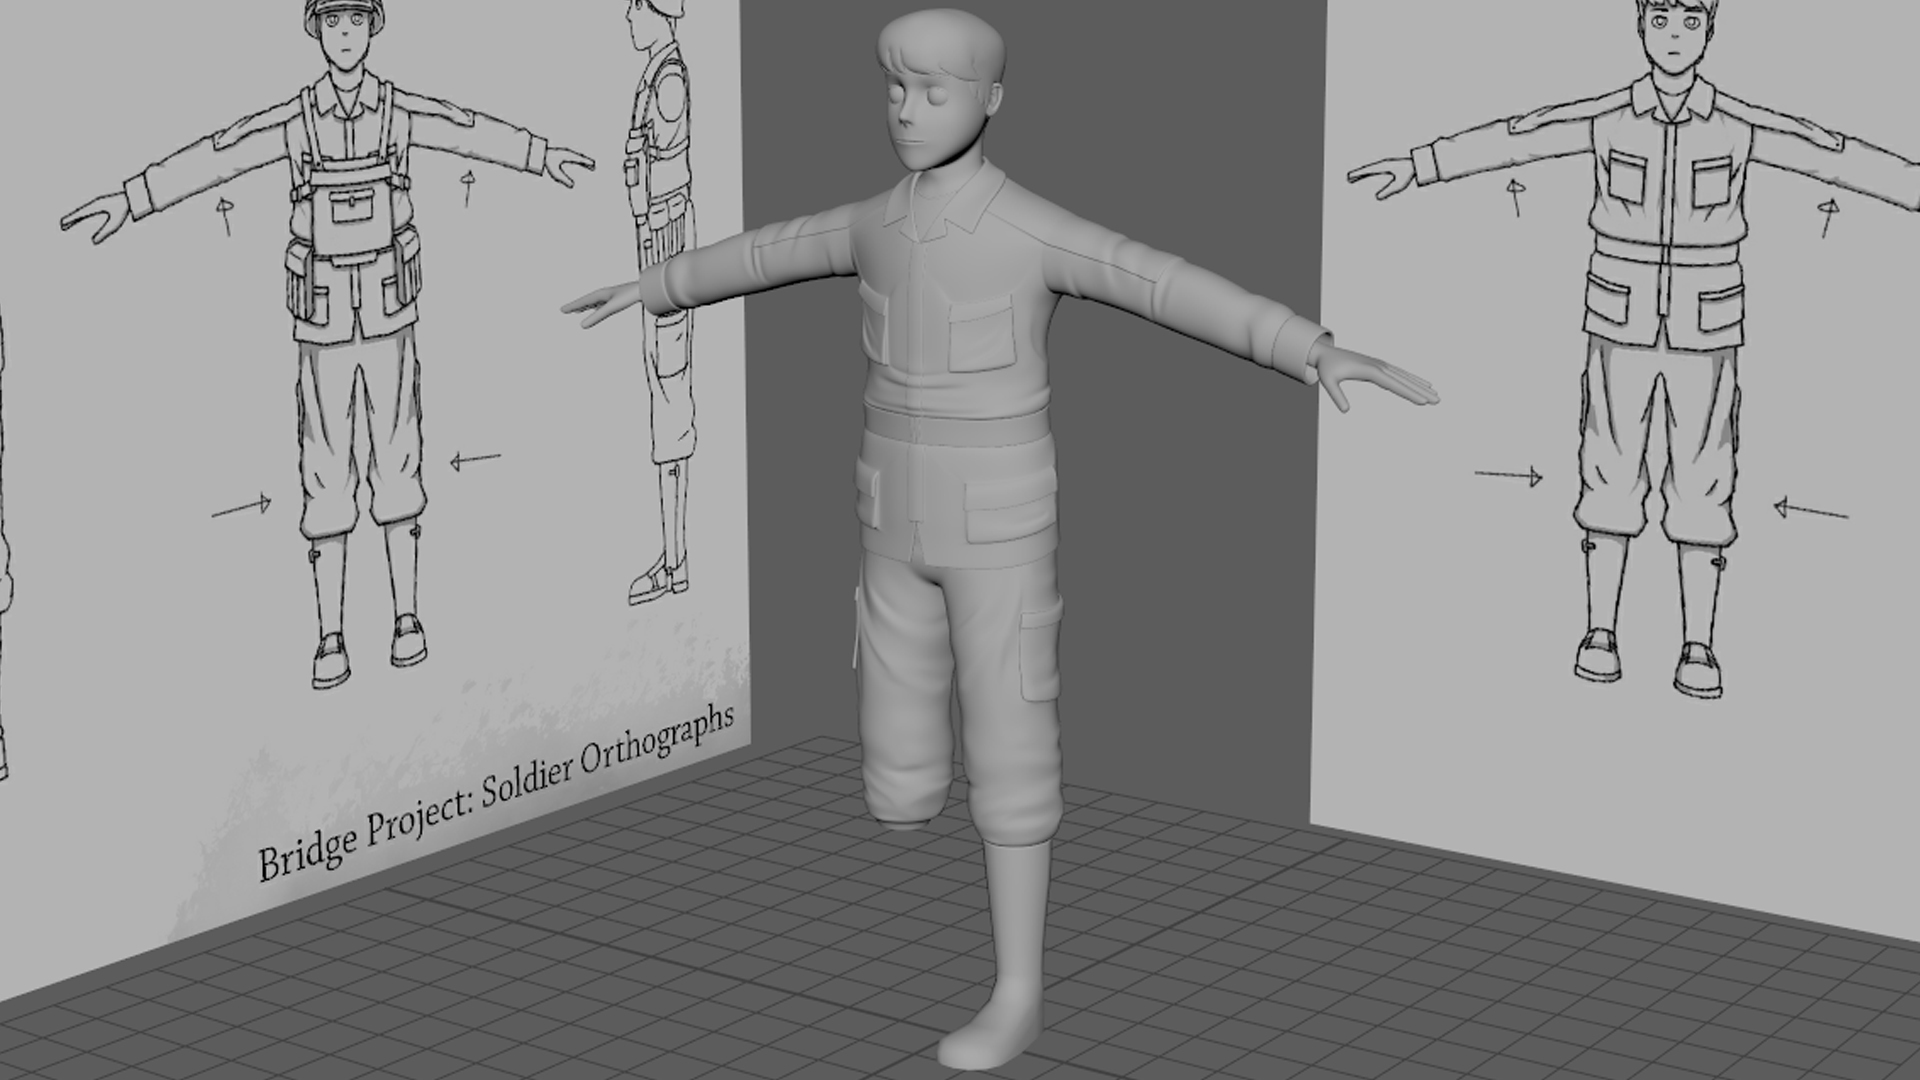
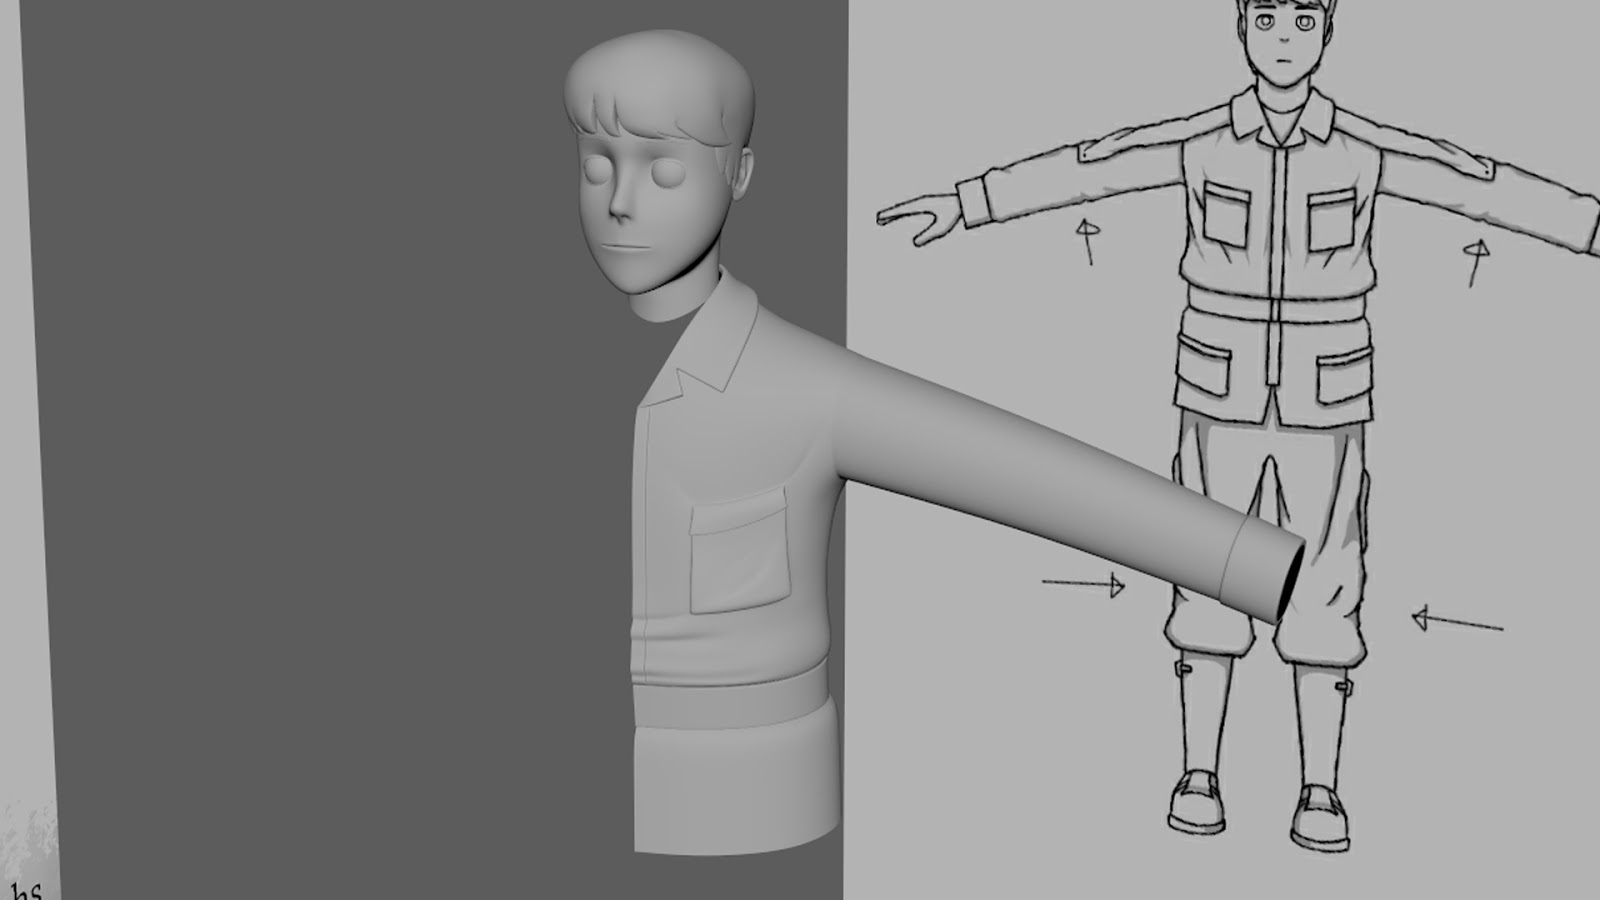
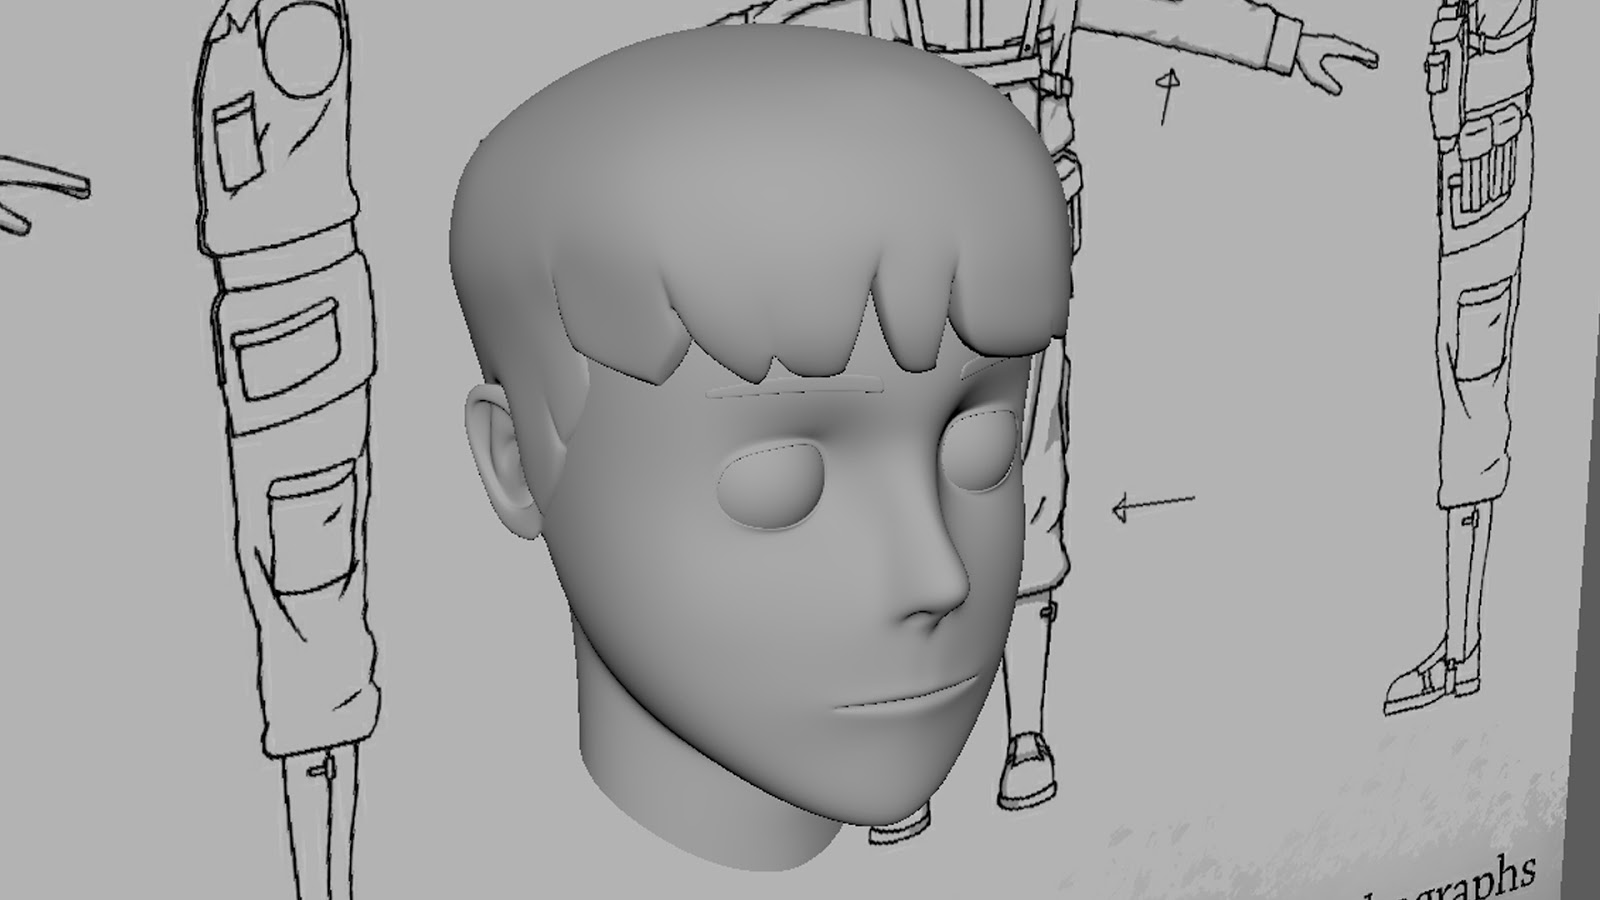
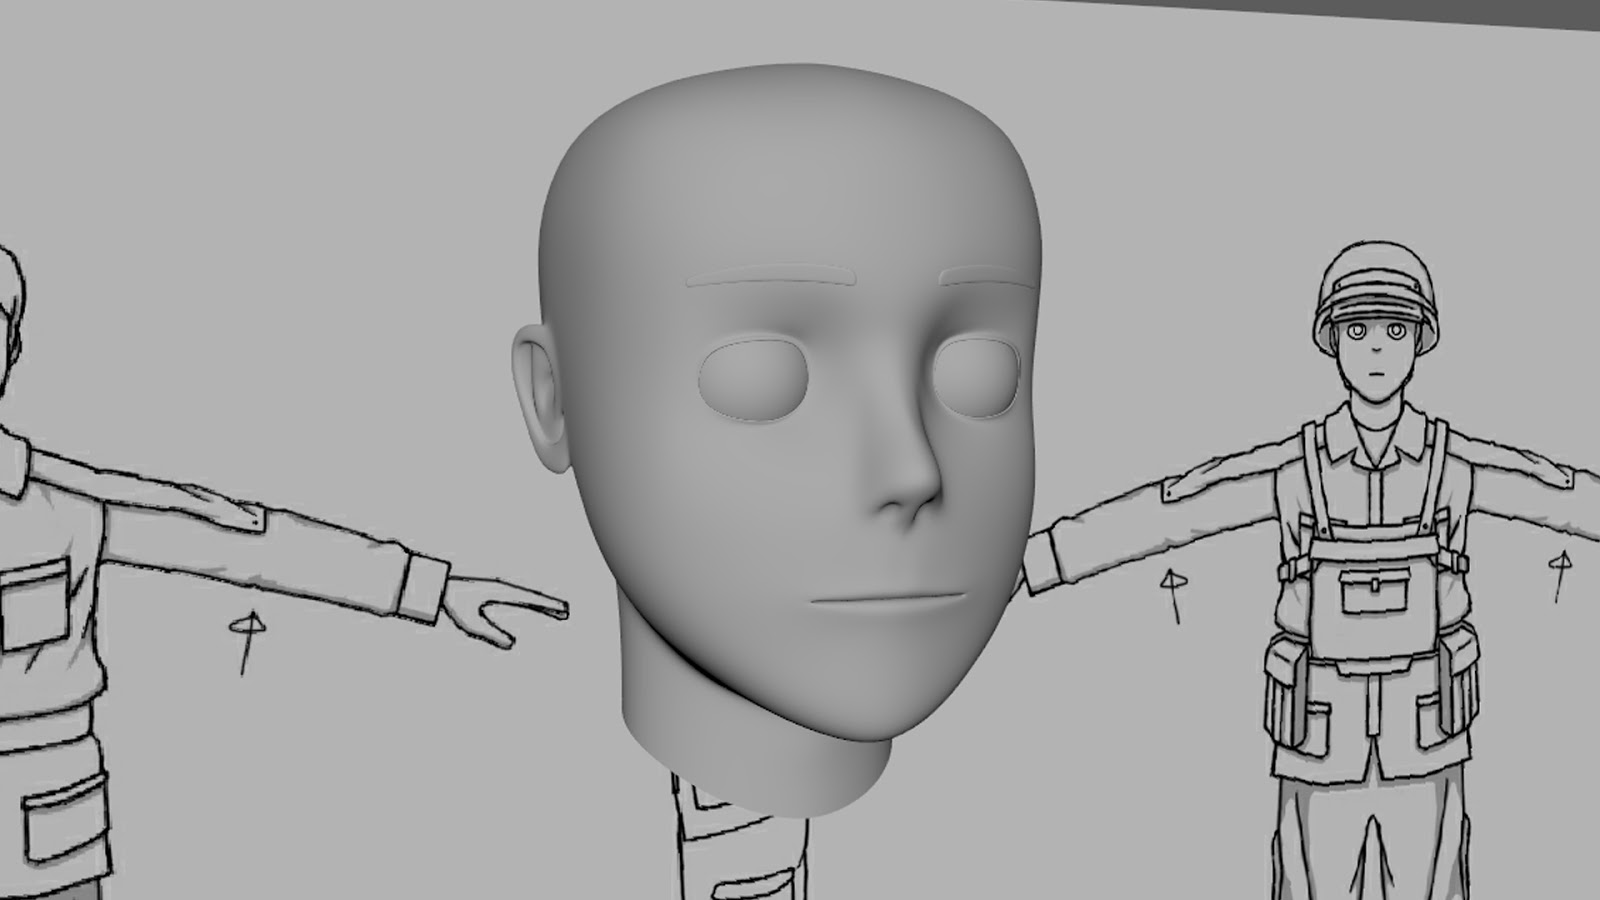
Continuing with the modelling of the character I have added several features alongside improving the geometry. This included the addition of nostrils, ears, eyelids, neck, lips and throat. These have been done to take a different approach to my previous animation, with semi-realistic facial features. The nose uses dimples that do not punch a hole in the mesh. Instead the hole will be described through textures. head front view The ear follows the same concept as the nose using a dimple to simulate an ear hole. The structure of the ear itself is not actually accurate to a human ear. During modelling it actually had to be sized up from the ortho-graphs to fit within a 3D world.  side view head geometry smooth head cutaway For the hair I started from two different approaches, one of which was starting from the crown and working outwards. On my third attempt I decided it would make more sense of start with the fringe. This is because of the most distinct shapes...